All is possible

Category: Techinque Page 15 of 18

Panasonic GH3 : outstanding videos, but as a camera?

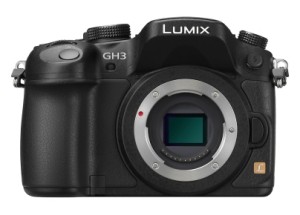
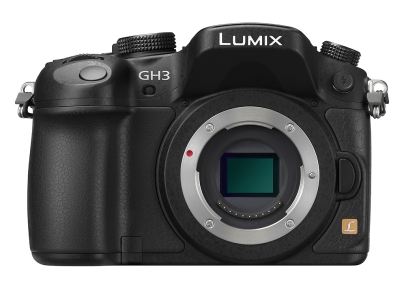
DMC-GH3I know it is curious to title an article in this way, since the GH3 was born as a camera, but it is a very common question.

For several years now, after Nikon with the d90 launched the trend of cameras for shooting, Canon has relaunched and dominated the market with its flagships and beyond, covering with excellent cameras a very substantial slice of the video market. Canon has been established as a photographic brand for decades, and its experience and quality is known worldwide. On the video side, Panasonic is catching up very quickly, and with the GH3 they have narrowed the gap even further, thanks to many clever touches and unquestionable quality.

Most people remain puzzled by the photographic side, that is, the reason the machines were born, because compared to Nikon and Canon it has a number of theoretical handicaps.
Since by passion and work I have been photographing for over twenty years, I have used Nikon, Canon, Fujifilm and now Panasonic DSLRs, I decided to make some comparisons to understand what this Lumix GH3 Camera offers.

Personally if I want to use a digital camera, I use exclusively shooting in raw, because I want to take the best and minimize the risks of castration of quality by using formats such as jpeg, the only camera that allowed me the luxury of jpeg was the Fuji s5Pro, a camera with the body of the nikon d200 and with the fuji sensor and technology, all the others I have tried however castrate their potential in jpeg, and considering that the gb of hard drives and cards cost about 1 euro per giga and raw photos fit about 50. For those who want to take decent photos I find the temporary expense of 0.02 cents per photo to be more manageable, especially if 1500 has been spent between the camera and a decent lens.

On simple technical examination, the GH3 suffers from a number of handicaps :

  • m4/3 sensor : being smaller it collects a little less light than the nikon and canon aps-c
  • higher crop factor : depending on the same lens (50mm for example) on an aps-c the crop factor will be x 1.6 while on m4/3 the factor is x2, so the lens will provide the same image, but with the m4/3 format it will be cropped at the outer edges a 25%, this has the disadvantage that wide angles are less pushed, but on vintage lenses only the central part is used and therefore the best part, suffering less from chromatic aberrations, lateral blurring etc

here you can see some photographs taken with the gh3, with different lenses, from lumix 14-42 powerX to 20mm 1.7, all the way to vintage ones like the minolta rokkor 50mm 1.4, tokina 24mm 2.8 (mounted straight, or inverted for macro shots), 35mm and 85mm samyang 1.4.

As you can see the detail and cleanliness all comes out, most of the photographs you see around with little detail are often caused by incorrect use of noise reduction parameters (which possibly is always better to do in post, with more overall control) or by low quality lenses (I often see people who invest 1200 euros on a camera body, but want to use scratched bottoms as lenses, which is comparable to buying a ferrari and then putting the tires of the cabbage car and the carburetor of a fifty). However as you see from the list, many photos are taken with vintage or manual lenses and the results are more than good.

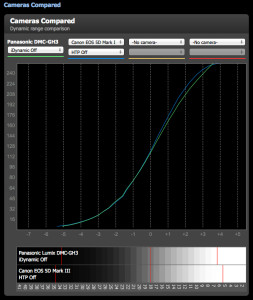
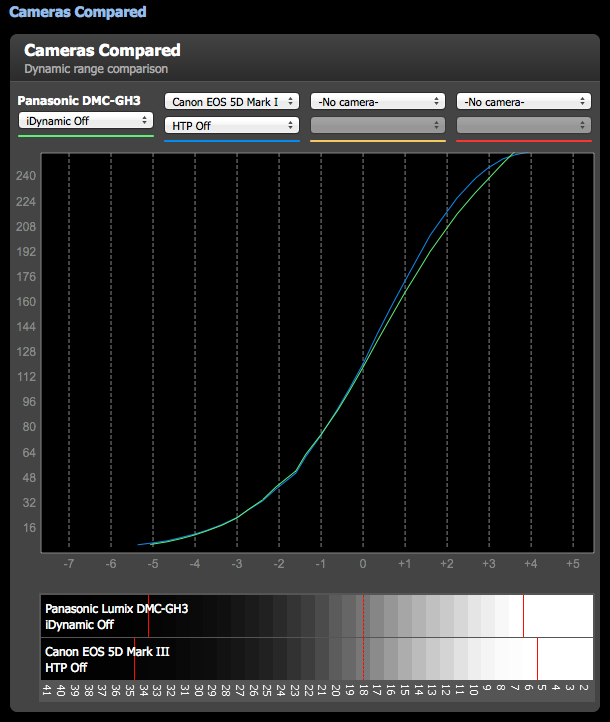
MkIII vs GH3Summing up, the camera has a good response to both color and density to light contrast, in fact not surprisingly the same reviewers of Dpreview tested it and verified that it has a sensitivity very close to that of the Canon 5D mark III, personally I agree on this point for video, while on the photographic side I would be more cautious, since recording a 14bit raw offers more space of action to the Canon shots and therefore to a greater recovery of information, as well as a higher resolution, but we are still talking about a camera that costs almost 1/3 of the Mark III.

Speaking of image definition and cleanliness, if you use decent optics, and so I’m thinking of the 12-35 2.8 for the Lumix or the 24-70 2.8 on the Canon you have very good renditions, very fast and efficient autofocus, and full tropicalization for the gh3 that I don’t mind for those who do more “action” photography.

Those who buy the Lumix GH3 do so primarily for video, since if their primary interest is photography and they want a mirrorless body with the m4/3 they turn to Olympus OMDs, but as a camera it defends itself reasonably well.


Full frame vs Aps-c vs m4/3

We often read several articles and threads about how fullframe HDSLRs are better and superior to competitors with smaller sensors, but no one really explores what the differences are and especially the disadvantages of FullFrame sensors, because there are several and NOT eliminable.

The only advantage of fullframe sensors is that by using fulframe lenses there are no crop factors and therefore a lens is used as an angle for what it is, it is not reduced, but that is the only real advantage, on the contrary there are a whole host of disadvantages that most fullframe advocates forget, or simply have never had two systematic experiences…

What are the disadvantages of a fullframe sensor?

  1. The FullFrame sensor uses the whole surface of the lens, which means no crop, this is good, but on the other hand you can only mount excellent lenses because otherwise you lose definition laterally, you can find halos, fringing etc. on the edges of the images… so you have to invest no less than a thousand euros to get very good quality lenses, or a good zoom like a 28-70 2.8 that costs 1600…
    With a smaller sensor you will use only the central part of the lens, so the best part, consequently by using medium to high quality lenses, you will always be able to take advantage of the best of the lens.
  2. Cmos sensors all suffer from Rolling shutter, that is, they scan the image one line after another, which means that very fast panning and rotational movements distort the images. The fullframe sensor on fast panorama movements generates a very annoying jello effect. The larger the sensor the stronger and more disturbing the effect, while with a sensor half the size it is almost imperceptible.
  3. Fullframe sensors possess greater pixel resolution than smaller sensors (crucial for the photographic side), but that becomes a handicap for video.
    Image scaling of the large sensors of HDSLRs results in most cases in a quality loss that does not occur with smaller sensors, because they use different scaling techniques. Sony in this case uses a pixel binning algorithm for scaling its FF camera and offers good definition without moires artifacts and aliasing, but it is a white fly…
  4. Large-sensor machines tend for some reason to overheat more than those with s35 and smaller sensors. Often because being born for the photo shoot, the burst, they are not meant for continuous, steady shooting. In my own experience with varying temperatures, but especially ambient humidity, I have encountered several overheating problems, while in “drier” situations I have been able to use fullframe cameras in the midday sun without problems of overheating lockup. This means that they offered me less working reliability….

So why use fullframe sensors?
To not have the crop problem that multiplies the length of the lens focal angle, which complicates life when using wide-angle lenses in tight quarters.

Is it worth it?
Now with the release of adapters like speedboosters that reduce the crop gap with multipliers of x ,058 on the m4/3 and also give you an extra aperture of brightness, there are fewer and fewer reasons to choose a fullframe sensor camera…

Of course I imagine someone will object that with fullframes they blur more than with aps-c or m4/3, have a good laugh, then tell him to study photography again, and then think again about his statement.
The myth that the fullframe blurs more stems from the fact that when comparing the two sensors everyone uses nonequivalent lenses to have the same focal angle, so on smaller sensors they use wider-angle lenses, which are known to have a greater depth of field…

In reality the majority of lenses are born for fullframe size, but then are projected by cropping to smaller focal planes, with the simple result that the depth of field does not change, because the concentration of light does not change, but is simply discarded.
Have a doubt? take a fixed, mechanical, 50mm 1.4 nikon from 40 years ago, place it via adapter in front of a 5d/a7r/7D/gh4, with the same shutter settings such as shutter speed and aperture, then superimpose it and you will find that the images, despite the crop of cropping around the image that captures more or less information, the depth of field is exactly the same, because it is the lens, its construction, how light passes through the different lenses and their projection that define the image, it is impossible that the sensor can depending on its size alter the light a posteriori…

The deception is related to the fact that lenses used to be designed for the focal plane, while EF-s lenses i.e. frontally like ef lenses and then with a concentration of light for a smaller format, but keeping the crop (so useless to make for a smaller format if you throw away part of the image anyway) the dof remains the same.

p1010076to demonstrate just look at this photograph taken with a m4/3 gh3 camera (camera declared no dof by fullframe fanboys, but with a fullframe lens in front, 50mm 1.4 and amazingly (for them, for me it is normal) I have the reduced dof of a fullframe… like my sony A7r.


Fotga 4×4 Neutral Filters

Very often filmmakers buy a mattebox and then it stops there, because the prices of filters often cost as much as the mattebox itself… but not always…

Depending on the products you can find decent quality filters without spending madness, but the problem with filters is the quality, if the quality is low the whole image suffers because you lose sharpness, and then to save a few tens of euros you end up worsening the whole image quality.

Today I tested neutral filters from a Chinese manufacturer found under the name FOTGA on Ebay. I started out biased, because the filters I had previously tried blurred my images, and having always used Lumix series cameras, which are known for image cleanliness and sharpness, it didn’t make sense.

The 4×4 filters are expensive basic filters; the kit we are talking about consists of 3 ND2, ND4 and ND 8 filters, which for normal lighting situations are more than enough. The kit exists of both full NDs and gradient NDs, which are useful for handling exposures of situations such as very bright skies and the like.

How did I perform the test?

  • Camera on the Lumix GH3 tripod
  • Camera set to 24p compression Intra 72mbits
  • Manual focus on fire table, which allows you to check sharpness dropout
  • White on table
  • First shot without filters
  • Shot 2 sec for each filter after redoing white for each filter

Result?

WB_ND_0
WB_ND_2
WB_ND_4
WB_ND_8

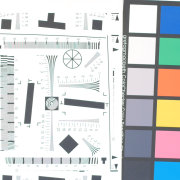
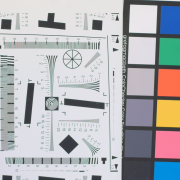
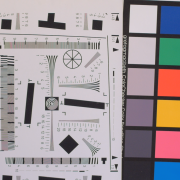
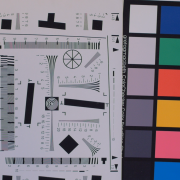
As you can verify from the images, there is no noticeable loss of sharpness even at ND8, and there is no particular dominance except below 0.1% so zero.

So I can say that for an expense of a little over a hundred euros you can have the double ND2, Nd4 and ND8 kits both plain and blurred.
If you have spent a couple of hundred euros for the Mattebox with filter holder, you can invest on these filters certain that they can help you in controlling the light without losing quality on the image.

Update 2015 :

I tested these filters with a canon 17-55 2.8 IS, downstop lens at 5.6 with a BlackMagic 4k camera.
Surprise: they turned out to be sharper and better than I expected, I shot in 4k raw of the focus charts and from filter nd2 to nd8 I did not lose in detail, they exceeded my expectations.

PRO :

  • cheap, but good optical quality, even at ND8 the color distortion is in the normal range, like other ND filters without IR filter
  • lightweight and supplied in double packaging with transparent films to protect them during transport
  • being made of resin a possible fall, if you are not unlucky that it lines, does not shatter them as with glass filters
  • the shading is soft enough that you can use them to often exploit the full dynamic range of the camera

CON:

  • they are made of resin, so they have to be cleaned every time you take them out of the package because by static electricity they attract dust and lint of all kinds.
  • resin does not have a coating to reduce reflections on the filter, so care must be taken, but it is also true that a quality glass ND with anti-reflection coating costs 2-3 times the whole 6-filter kit.
  • are more delicate and easy to scratch against the classic glass filter, but if they fall out they are more likely to be saved.

In conclusion a good value for money as a product.

Update 2015B:

When you place a very strong ND filter in front of a modern sensor, there is a risk of dominants and color changes, these arise not so much from the color of the filter, but from a phenomenon called IR Pollution, that is, by not filtering the Infrared rays correctly, but by altering their frequency, the filter alters more or less significantly the color of the light in certain areas, causing dominants colored red, brown etc on dark colors.

To avoid this problem when placing a very strong ND filter, one must also place an IR Cut filter, or use ND filters that are treated to cut those frequencies.

Depending on the sensors, photographic and film, you have to cut different frequencies, so an ND filter that is good on one sensor may not be suitable on another, so the ND filter that is good on Red may not necessarily go on Alexa or BMC, and vice versa.

I did a test related to this very problem with the bmpc4k, and surprisingly, the dominance becomes evident only when you stack multiple filters together. In common use, on the other hand, the various filters seem to introduce no obvious dominance to worry about in common use of these filters.

Let’s start from the principle that that minimal dominance introduced was a problem, it means we are working at a very high level for images, so there will be the budget to buy both a serious IR filter and high-level ND filters, which will each cost at least a dozen times the cost of the entire kit.

In this video you see the images compared directly, and if you want to experiment on them you can do the download of the original dng.

Panasonic Lumix GH3 a camera for VideoMakers

After using its little sister the Lumix GH2 for two years, I tested Panasonic’s newest addition, the Lumix GH3, a digital camera hidden in the body of a mirrorless…

Since the birth of the Nikon d90, which made 1280 x 720 movies, filmmakers had realized that so much would change… Canon cleared the concept of shooting with HDSLRs, and Panasonic has learned many things, from the mistakes and shortcomings of the competition…

What does the new Lumix GH3 offer the filmmaker?

The camera was born with features geared toward professional shooting. After an almost muddled start with the GH2, Panasonic has adjusted its focus by optimizing the video compartment of the new camera.

  • Three different ways of handling video, encoding it in Mjpeg, Avchd and finally in MOV container with frame rates varying from 60 to 24 depending on shooting settings, all in FULLHD.
  • Native mov I-frame quality at both 50 and 72 mbits outstanding, no need currently to Hack (see GH2 with Flowmotion and the like) to extrapolate from the sensor the extraordinary quality of this machine. (Maybe for a raw…)
  • Robust and clean codec, no blocking or other junk in the shadows.
  • Slowmotion mode allows 24p footage shot at 60P so a true 40% slowmotion in fullHD in-camera.
  • Time code video running free or can be set manually
  • CLEAN 4:2:2 8 bit HDMI output for external video recording without moires shadow (slightly present in HighFreq recordings).
  • Zoom with 1:1 pixels for lumix lenses or manual focus that also works with external monitor connected via HDMI (which the GH2 did not)
  • Headphone output that can be used to monitor recorded audio (rec sound mode) or to externally record audio (realtime, pass-through mode without audio compression).
  • 3.5mm microphone input with internal adjustment of as many as 19 audio levels, a remote input for remote control.
  • Wi-fi connection with app for Iphone, Ipad, Android for remote control, remote viewing and more.
  • New bright and adjustable Oled monitor for shooting in complex conditions and angles.
  • Built-in Timer for creating Timelapses without the need for external products.
  • Good light and shadow sensitivity, with native sensitivity of 200 iso.
  • Full sensor utilization and format reduction to FULLHD using pixelbinning technique eliminating problems such as aliasing of cameras using line skipping.
  • On monitor you can view audio levels, grids, gyroscope that helps you see if the camera is on bubble, exposure histogram, Overexposure Indicators, and much more…
  • Heavy and sturdy body, tropicalized, battery pack provided with contacts below the camera (unfortunately with only one battery, but I await a battery pack compatible with multiple batteries).
  • Battery lasting me almost three hours in video, record-breaking (unstabilized manual lenses).
  • The body has several customizable buttons that allow us to optimize the use of the camera according to personal work habits and choices.
  • Zoom window system for touch focus control swivels on the LCD.
  • Much higher sensitivity for low light shooting with image setting adjustments to balance the ratio of noise reduction to final image quality.
  • Sensor scan optimization that features less rolling shutter than the gh2
  • Much faster autofocus than the GH2, and controllable (like GH2) via touch LCD by touching the element that needs to remain in focus.
  • Higher sensitivity and cleaner at high iso than gh2 without losing definition, you can use up to 1600iso without particular loss.
  • WI-Fi module gives the ability to download photos immediately after shooting, which would normally be of little use, but makes it more convenient to use gh3 for software-managed stopmotion.
  • Standard in-camera TimeLapse function and preview as a movie directly IN CAMERA.
  • Larger overall dynamic range and very close to a competitor costing twice the price (see below Dpreview’s dynamic range test between the MkIII and GH3), although all the MkIII admirers say there are monstrous differences between their camera and the others…but have they ever tested them systematically, and verified them instrumentally?
MkIII vs GH3

What’s not to like?

  • Iso 200 minimum in video, no way to emulate a lower iso…which means that in most outdoor shooting I have to be well equipped with neutral filters, because the minimum sensitivity is very very high.
    I would have liked some form of iso downsampling, such as the extended isos that are in the photo compartment for video as well, hopefully good Vitality can get a handle on that…
  • The different color presets differ little in tonal range, I expected more, used to the GH2 where the different profiles have different working ranges, but the richness offered is already very good.
  • With the 20mm 1.7 Lumix occasionally has focus uncertainties that I do not encounter with the 14-42 powerX. Panasonic will release a firmware update and fix it, as with the 12-35 which has already been updated.
  • Some setup items are present only in the photo menus and not in the video one from list, but they reappear in the quickmenu, for example if I want to disable the stabilizer, I have the menu item in the photo compartment, while in the video one I don’t, to disable it I have to go to photo mode, disable it and go back to video… but nothing that a firmware update can’t fix, however it is tedious.
  • The focus peak is missing, which had been talked about (video interview of a panasonic engineer),but mysteriously not present, on the gh3, however on the GF6 it is present as a feature…will it appear with an upcoming firmware?
  • It is inconceivable that you cannot set shutter and iris differently between photo and video departments.
  • In preview before pressing REC there is still a difference in quality (less than recorded) in the preview monitor as in the GH2. It is not understandable why–if the camera in recording (thus at maximum processor load) can have the preview correct as quality, why can’t it when there is no active recording?
  • the lumix app provides for starting recording remotely via WI-fi, but from that point on the machine is blind, so you can’t turn off recording and the video stream no longer arrives via wi-fi, so it’s basically good for a cell phone self-timer and little more.
  • the Lumix app provides for once connected to the camera to transfer only jpeg photos to the phone or tablet, there are no on-the-fly raw to jpeg conversion systems for transfer.
  • there is (to date) no SDK to develop support for wi-fi or USB connection, so you cannot hook external remote software (StopMotion, special timelapse, Motion Control, etc) to the camera.
    And/or one cannot develop waterproof housings for underwater filming with remote control, but one must be able to mechanically operate the buttons, which raises the cost of the housing and increases the risk of infiltration
  • The battery pack contains only one additional battery even though there was room for two batteries.

Moires on the GH3

On the net there is talk of moires on the GH3 and not on the GH2, yes, there is moires on the camera, particularly using Lumix lenses it is highlighted more, but we are talking about small things, that is when we go to shoot at very closed apertures images with high frequency detail, so very very fine.

To test the moires you can see what I did below, a movie (to be seen in the original fullHD) where the footage shot was thrown in sequence on an aftereffects timeline and scrolled with contrast and sharpness values from one extreme to the other without seeing any particular differences on the slight moires of the camera.

//www.youtube.com/embed/41FIx8RgKPc?rel=0

If you want to download the original file, you can do so from here, also because to judge the video file it must be viewed in FULLHD without going through Youtube compression.

I work with footage from different DSLRs, often with other brands I am used to seeing the “wriggling snakes” and “swarms of flies” on high frequency details.
Seeing these kinds of artifacts on the GH3 images for me is like saying that moires are nonexistent, especially because in practice then I didn’t find them on the movies, because you have to find that exact combination of frequency, camera distance and focus…

Curiosity:

The HDMI output is free of moires, so it occurs to me that it arises in the video compression, probably a future hack, or a slight variation on the bitrate by panasonic, or on the compression tables could eliminate the problem completely.

Conclusions:

A great camera for shooting video, for photography it is equal to the gh2, it suffers (theoretically) from an 8 bit raw, and a poor raw latitude when compared to the entrylevels of nikon and canon where for half the price they offer 12 and 14 bit raw, but you can’t have everything, I bought it to shoot not for photography, though still… it does well in that department as well.

Final notes: this quick review (there are many and more extensive ones, the best can be found on Dpreview, of the true DSLR review pros) is a series of practical and pragmatic observations from a videomaker, little talk and lots of substance. It will always be in working in progress, because as I use the camera I will update the review and be able to say more about this amazing working tool. Maybe in a month or so I can complete it and accompany it with a minimal reel of images shot all with the GH3, in light and shadow, day and night 😀

Update: I have posted a brief review of the photographic part of the Lumix GH3 here

Rewrap files, how best to handle them quickly.

How to manage a rewrap under MacOsX using free software

Sometimes it takes very little to make your life easier, but it takes even less to complicate it… When working with several cameras and dslr’s that use the AVCHD structure you can have some problems managing them from editing and post programs, because they use the MTS format as the container, and a series of folders and subfolders as the structure. It all originated from the idea of recording this way, because it is also the format used to create a bluray, so copying the complete structure inside a bluray disc will then be read by a regular player. All well and good if we want to make a bluray right away, but if we want to edit them … both under windows and under mac we may encounter difficulties.

Under MacOs X the AVCHD structures are seen as a more … “rigid” structure so it is important to know how to handle them.

The avchd is an H264 file encompassed in a structure of folders and subfolders that are useful and parallel to those of the bluray to simplify the transition from the camera to the bluray disc with a simple burner, but when we want to edit the files we are faced with files with .MTS extensions, which the finder does not handle comfortably (actually neither does the windows explorer).

The easiest, fastest and most convenient operation to handle them is the process called ReWrap, that is, we change the container, from Mts to mov. ReWrap does NOT recompress the data, so there is NO alteration or loss of information. But by changing the container to mov magically all programs will open the files, the finder will preview them for you, and so on…

Also the operation is little slower than copying the files.

There are several applications that perform rewrap, and in particular the most powerful one is Ffmpeg, a free utility that performs hundreds of tasks, with speed, quality, etc. too bad it is a line command program, that is, it is run from the command console as was done 40 years ago, fortunately several developers have created graphical interfaces to perform this task.

I point you to two software programs that use ffmpeg under mac, which allow you to rewrap. Below you will find directions for using the first one free, and the link for the second one which is paid, although a very trivial amount.

What are the steps to take?

Few and simple :

Step 1 : being able to read the structure files as a file and not as a folder

To copy the AVCHD stream files we need to see its folder, so we open the related tab :

avchd_02

Show package serves to see the contents

The Private folder looks like a file, but it really only takes a little, with a right click we choose :

SHOW PACKAGE CONTENTS

So we can navigate the internal folders, we will have to repeat this operation for several folders to navigate the subfolders.

We need to go inside the structure of the AVCHD

Basically we have to get inside :

– PRIVATE – AVCHD – STREAM

avchd_05

The actual path

In this very last folder we find the Video files.

Let’s copy them to the ‘Hard disk to be faster in the various procedures.

It is also possible not to copy them directly to the disk, but it would be slower operation


Stage 2 Media Converter

Let’s go to the site of Media converter, a Free utility that acts as a Front END to free ffmpeg encoder.

avchd_07

which preset to use

From the Presets section, download the preset for AVCHD rewrap, because it is not standard in the program.

There are two, one that doesn’t consider audio, the other that does.

The program requires no installation

just copy it to the application folder and run it.

avchd_08 how to add presets

To install presets just go to preference, and click on the preset item.

To add the preset just click on the symbol in the lower left corner

The little window you see below will open, and click on Open an existing preset file, and select the downloaded file.

Once you have loaded the presets of your choice, you can close the preference panel. And you are ready to perform the ReWrap.


Step 3 CONVERSION

avchd_09

easy conversion

We choose from the drop-down menu the format we want as the final output for our files, in this case we choose Re-Wrap.

We drag the video files we want to handle directly onto the program window.

As soon as you release them the program asks where to save the resulting files, you specify a path, and the program starts working.


avchd_13


And then you only need to wait a few seconds or minutes depending on the number and duration of the movies.

The result will be .MOV files that can be opened and managed in various programs.

Side note, if for some reason it does not make you install the preset for all users, the reason is very simple, you do not have permission to update the internal folders as a user, so you will have to download the free utility BatChMode, which allows you to reset the permissions of the preset folder of the program.

An alternative is to manually copy into the user/user name/library/application support/media converter/Preset folder the preset files that you can find online.

Another very interesting application for rewrapping under MacOsx is the Emmgunn suite, a series of utilities that allow you to either rewrap a file to mp4/mkv/avi or compress it to those formats if the source codec is not supported in the rewrap. The free version has the limitation of doing one conversion at a time, but enough to appreciate the quality of interface etc. Also based on Ffmpeg, it is an encoder suite that costs less than a pizza and is worth it for speed and quality.

Update July 21, 2018: thanks to the gradual development of software vendor’s stinginess (I am being caustic today and I have reason to be) most video software no longer reads/decodes audio in AC3 codec because the Royalties with Dolby have expired and have not been renewed, Windows with the 1851 upgrade has removed support for that codec from the system so you may find that your files are without audio (most prosumer cameras and cameras use dolby AC3 for audio encoding). The preset that rewraps the video converts the audio to uncompressed and then allows you to then read it even from applications without AC3 codecs


Page 15 of 18

Powered by WordPress & Theme by Anders Norén

error: Content is protected !!